


In the realm of publishing and marketing materials, the printed booklet remains a classic yet effective tool. Whether it’s for product catalogues, event programs, or informational brochures, creating a booklet involves careful consideration of how to arrange pages, especially when preparing for booklet printing.
Understanding how to arrange Pages for Booklet Printing isn’t easy for a beginner, but don’t worry! Here to help…
Understanding the setup for various booklet types—such as Saddle Stitched, WireBound, Perfect Bound, and Coilbound—is crucial to ensure a flawless finished booklet end product.
This guide, brought to you by MVP Print, will walk you through the process, covering essential details including margins, bleed, and edge spacing tailored to different binding types.
How to Arrange Pages for Booklet Printing – Setting the Stage: Understanding Booklet Binding Types
1. Saddle Stitched Booklets:
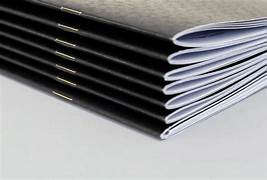
A Saddle-stitched booklet created by folding sheets in half and binding them together with staples along the fold. For this type of booklet, pages need to be arranged in a sequence that makes sense when folded in half.
The total page numbers should be divisible by 4 (4, 8, 12, 16, etc.), ensuring a proper folding sequence. Any page count not divisible by 4 won’t work as each sheet printed is a folded sheet, with a specific fold line.
Even if printed as spreads, we will ensure the registration (front to back on the cover and inside pages) is correct when we do pre press on your Saddle Stitch Booklets. Don’t worry about it when submitting your file
Some clients add in a blank inner cover page or two to make the booklet page count up to the right amount. But there are four pages to each of the flat folded sheets – so as long as the total multi page document (both cover and the inside pages) is divisible equally by four pages, it will be fine.
This is the most common mistake when most Saddle Stitched Books are supplied to us.
A Saddle Stitched Book can have a final page layout as a scrolling PDF file. If the Booklet Cover is thicker than the inner pages, Supplying the interior pages in one booklet file is best, and another Print-ready PDF Document for the covers.
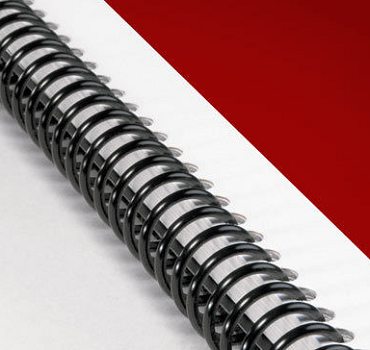
2. WireBound Booklets:
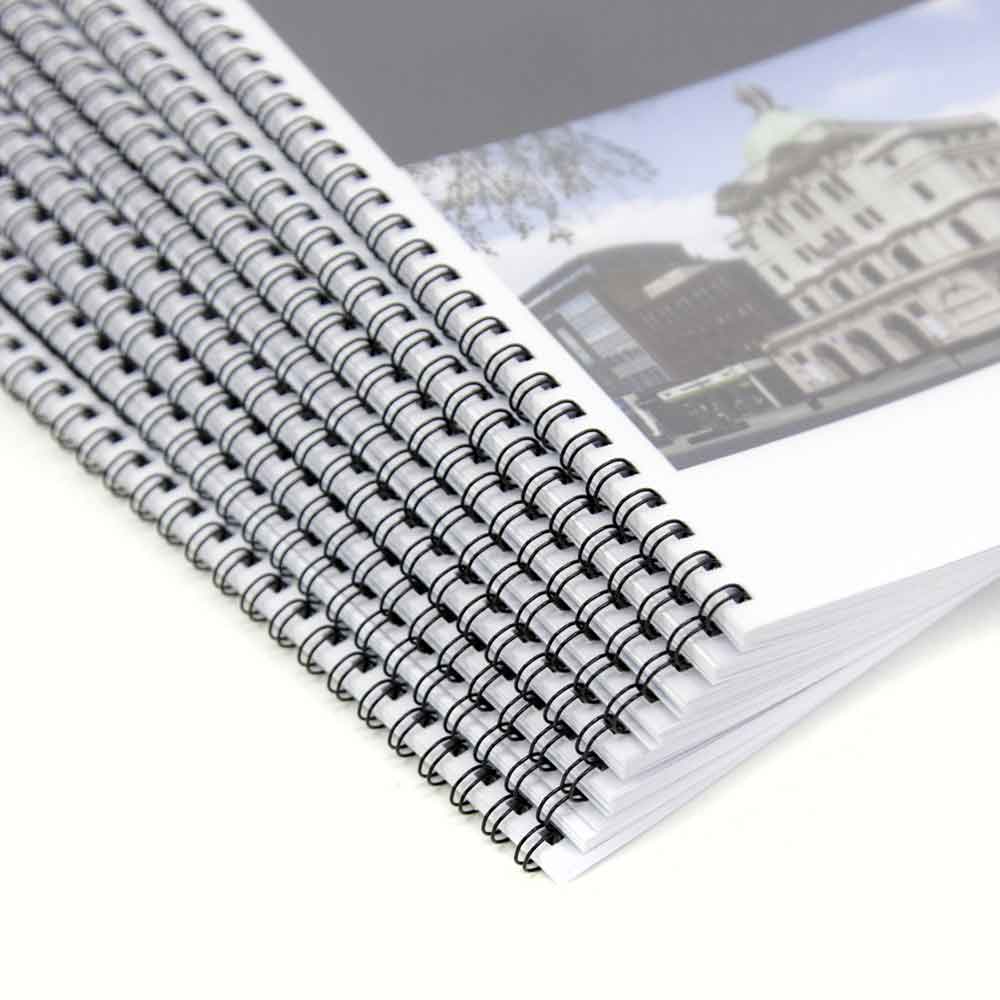
Wire binding (Spiral Binding) involves punching holes in the sheets and using a wire spine to hold the pages together.
This binding type allows pages to lie flat when opened, making it convenient for user interaction. Unlike Saddle Stitching, the pages can be arranged in any sequence.
They can be supplied as two-page spreads, or again, as a scrolling PDF in consecutive page order.
Like the Saddle Stitch Binding Method, if the covers are thicker than the inner pages (which they should be with all other Book and Booklet Printing other than Saddle Stitching), supply a separate file for the proper order of the inner pages, and another for the cover pages.
Aside from this, page setup for Spiral Binding (Wire Bound) is the most straightforward.
3. Perfect Bound Booklets:

Perfect binding uses glue to secure the pages to a wrap-around cover. Pages are stacked and glued at the spine. In this case, the total number of pages should be in multiples of 2 for a balanced layout.
Of all the Book types, learning how to arrange pages for booklet printing for Perfect Bound Books is the most difficult.
If you can supply your booklet printing project as spreads, in the correct numerical order and with the spreads set up with consecutive pages and cover Layout correct – you are a guru and need to read no further!
But to be honest, aside from experienced pre-press professionals who can set up a professional booklet in Perfect Bound format to the correct Print Mode, you are far better at supplying it with a scrolling PDF, with the pages in exact order.
You can contact us regarding the booklet’s spine – we can provide a width based on how many pages you have, and stock selection, so you can design accordingly.
4. Coilbound Booklets:
Coil binding involves inserting a plastic or metal coil through small holes along the edge of the pages. Similar to wire binding, the pages can be in any sequence.
Very similar (almost identical) pre-press setup to Wire Binding (Spiral Binding), with the binding process itself being the only real difference. It has the same page arrangement, and the page count restrictions (or lack thereof) are the same as when printing booklets for Wire Binding
However, instead of using a professional looking metal wire, a Continuous Plastic Coil Bind is used on the binding edge.
How to Arrange Pages for Booklet Printing : Margins, Bleed, File Submission and Edge Space
Margins:
Margins are essential for both aesthetics and functionality. They ensure that text and images are not too close to the edge of the paper.
For a standard layout, a 3mm margin is a good starting point. However, the specific margins might vary based on the design and layout, but they should be consistent throughout the booklet.
File Type:
Without exception, the best file type to be received is a Print-ready PDF File. Be it printer spreads, or individual booklet pages, the print settings need to be in CMYK Format, and the finished booklet in (at least) 300dpi resolution.
RGB is no good for printing booklets – RGB is screen resolution, and the booklet’s pages will be converted to CMYK, resulting in a colour shift you may not want.
Adobe programs are by far, the best to use for print. If you are proficient in Indesign or Illustrator, you are best placed to provide Print-Ready Art. From there, Publisher can be OK, but most people have bleed issues.
And Canva, despite the hype, creates the most confusion with people trying to send through a print job. Microsoft Word brings up the rear.. its a text program and has no professional open print settings. It also can reduce the resolution of images on the layout file. As its name suggests, it’s for `Words’ .. not pictures or images!
Page Bleed:
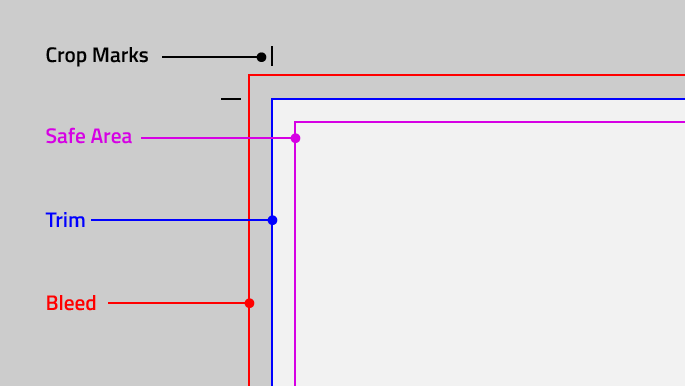
Page bleed is the area where images or colours extend beyond the edge of the sheet before trimming. Printers typically require an extra 3mm of bleed to ensure that the final booklet has no white edges on the printed sheets.
Edge Space for Different Binding Types:
- Saddle Stitched: Keep important content away from the spine by leaving a larger inside margin. Ensure that no crucial content falls too close to the spine, leaving at least 1.5mm as a safe zone.
- WireBound and Coilbound: There are no specific edge requirements since the pages lie flat when opened.
- Perfect Bound: Similar to Saddle Stitched, a larger inside margin is essential to prevent content from getting lost in the spine. Aim for a 3mm inside margin to maintain readability.
How to Arrange Pages for Booklet Printing : Practical Steps for Arranging Pages
- Design in Spreads (If you can): Work on your design in spreads. Visualize how facing pages will appear together to maintain a coherent layout.
- Sequence Planning: Arrange pages in the correct order based on the binding type. Remember the divisible numbers for Saddle Stitched and Perfect Bound booklets.
- Consideration of Bleed: Extend images or colours that bleed off the edge to ensure a clean trim in the final product.
- Mock-Up and Review: Create a mock-up or digital preview of your booklet to check the layout, margins, and page sequence. Ensure that no important content is lost in binding or trimming.
How to Arrange Pages for Booklet Printing : Final Thoughts

Arranging pages for booklet printing involves a blend of creativity and technical precision. Understanding the intricacies of different binding types for printing booklets and their specific requirements for margins, bleed, and edge space is vital to achieving a professional and polished final product.
By following these guidelines, you’ll be better equipped to create and organize your booklet content, whether it’s for promotional materials, catalogues, or informational brochures.
With the expertise of MVP Print and this comprehensive guide, you’re well on your way to crafting successful printed booklets that stand out amongst the crowd, and your competitor