
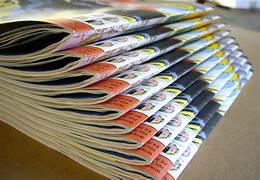
Saddle stitch binding is a popular, cheap way of printing books. It’s great for smaller works like booklets and magazines. These published items are easy to read and lie flat when you open them.
This method uses paper folded into groups of four pages. Then, two staples are put through the folded edge. It looks professional and is faster than other methods like perfect binding. This makes it ideal for many things, from business brochures to travel guides.
Saddle stitch binding can be customised, making it perfect for many needs. At Preferred Direct, books are finished with care and quickly. Its low cost and light design have made it very popular for smaller books. These publications are simple to read and carry, mixing style with practicality.
Key Learnings
- Saddle stitch binding is suited for publications ranging from 8 to 100 pages.
- Pages in a saddle stitch booklet must be in multiples of four.
- Offers quick turnaround and lowers finishing cost compared to perfect binding.
- Saddle stitched books lie flat when opened, improving how they can be read.
- It’s commonly used for different types of books and guides because it’s cheap and works well.
What is Saddle Stitch Binding?
Saddle stitching is a top choice for making booklets and small publications. It joins folded pages with wire staples through the fold. By stapling through multiple layers, it keeps the pages securely together.
Definition and Process
In this method, pages are first printed and then folded into halves. This folding creates four pages from each sheet. All these pages are then stapled along the fold. Because it doesn’t use glue, it’s efficient and quick. It’s best for books with up to 100 pages and in multiples of four.
Comparison to Other Binding Methods
Compared to perfect binding, the saddle stitch binding method is straight forward and fast. Perfect binding, used for thicker books, glues the pages at the spine. It gives a neat edge but costs more. Saddle stitch is economical and quick, perfect for smaller projects.
Saddle stitched books can open flat, making them user-friendly. This is great for manuals and catalogues. They work well for both small brochures and larger publications, offering great flexibility in size.
Let’s see how saddle stitch and perfect binding compare:
| Aspect | Saddle Stitch Binding | Perfect Binding |
|---|---|---|
| Cost | Less expensive | 10%-15% more expensive |
| Page Count | Fewer than 100 pages | Higher page count |
| Turnaround Time | Faster | Slower |
| Aesthetic | Professional appearance | Smoother front edge with no seam |
| Use of Glue | No | Yes |
In short, saddle stitch binding is both affordable and quick. It suits many kinds of shorter printed works very well.
Advantages of Saddle Stitch Binding
Saddle stitched book binding is a top choice for many people. It’s a great mix of being cost-effective and looking professional. That makes it perfect for lots of printing jobs.
Cost-Effectiveness
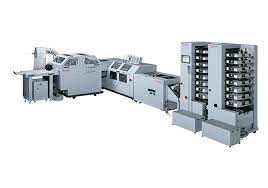
Saddle stitch binding is loved because it saves money. It uses less glue and needs fewer workers, cutting costs. This makes it a great choice for making brochures, magazines, and small catalogues. It’s also faster than some other methods, perfect for quick projects. Modern machines, like Muller Martini stitchers, help make it even more efficient and affordable.
Professional Appearance
This method not only saves money but also makes your print work look sharp. Magazines that want to impress readers really benefit from it. The flat spine looks neat and proper, no matter the paper or size used, it looks professional. It fits different paper and sizes, keeping things elegant.
| Binding Method | Material Requirements | Page Count Suitability | Turnaround Time | Professional Appearance |
|---|---|---|---|---|
| Saddle Stitch Binding | Minimal (No Glue) | Less than 100 pages, multiples of 4 | Faster | Flat Spines – Professional |
| Perfect Binding | Hot melt or polyurethane adhesives | More than 60 pages | Longer | Printed Spines – Custom Text |
In the end, choosing saddle stitch books means getting a mix of low cost and top quality. It’s the best of both worlds for many printing needs.
Materials and Tools Required for Saddle Stitch Binding
To get a top-notch look, it’s key to know the materials and tools needed for saddle stitch binding. Different styles of paper, various staples, and stapling machines are used. This ensures all pages stick together well, even when the booklet is thick.
Types of Paper
Saddle stitch binding can be done with many paper types. You might pick a light paper for things like brochures, or a heavier, sturdy paper for magazines and booklets. The kind of paper you choose affects how the final project looks and feels, so choose wisely.
Staples and Stapling Devices
Instead of normal staples, a spool of wire (generally with excess thread to ensure 100% stitching) is used for saddle stitch binding. This method makes the binding stronger and more durable. There are different machines for different needs; some are great for small jobs, others for big projects. These machines can also help with folding and organizing the pages, making the whole process smoother.
The Saddle Stitch Binding Process
Saddle stitching is a great way to make pamphlets, magazines, and booklets. It works best with 100 or fewer pages, in groups of four. This method makes sure the end product is strong and looks good.
Folding and Collation
The first thing is to covert them to folded paper and put the pages in order. Each sheet gives you four pages. It’s important they are perfectly aligned. This makes sure your publication stays in order, which is key for the next steps to go well.
Stitching Techniques
Next, all the sheets are bound together with staples through the middle. This way of sewing uses strong materials and machines. It’s an important step, making sure your book is tough enough for everyday use.
Trimming and Finishing
Trimming and cleaning up the edges come last. After stitching, the extra paper is cut off for a neat finish. This final touch gives your publication a pro look. You can also decide to use a special cover, like a Plus or Self-Cover, based on what your project needs.
| Aspect | Saddle Stitch Binding | Perfect Binding |
|---|---|---|
| Suitable for | Pamphlets, magazines under 100 pages | Softcover books, journals, catalogs |
| Method | Stapling through the spine | Gluing pages to the spine |
| Page Count | Multiples of 4, typically under 60 | No specific requirements |
| Turnaround Time | Very quick and efficient | Longer due to drying times for glue |
| Durability | Strong, but more suited for lower page counts | Very strong, supports higher page counts |
| Customisation | Plus Cover, Self-Cover | Printable spine for added aesthetics |
Saddle Stitch Booklet Design Considerations

Designing a saddle-stitched booklet involves focusing on a few key areas. This helps make sure the end product looks professional.
Page Count and Creep
The number of pages in a saddle stitch booklet must be a multiple of four. This is because of how they are folded. Matching the page count correctly is very important.
Certain issues might occur for thicker booklets with more pages, like creep. Creep can make inside pages stick out more. To avoid this, design adjustment is necessary. It ensures your booklet has a neat, straight edge.
Cover Design
The cover of your booklet is important for its look. You should leave a 0.125″ bleed and think about the spine’s width. This makes sure the booklet’s front and back cover align well.
Since saddle stitch booklets work best with fewer pages, choose thicker cover paper. A 128 gsm art paper is a good choice. It keeps the front cover sturdy and fits the page limit well.
Layout and Margins
Getting the layout and margins right is crucial. It enhances the booklet’s appearance and neatness. Making margins equal on all sides is a good idea.
Ensure the colours match across the booklet. This stops any uneven looks. Talking to the printer early helps make sure everything turns out as you want. They usually take care of how the pages are put together.
Companies like Searles Graphics have top-notch equipment and materials for saddle stitch printing. Following guidelines for page count, cover, and layout leads to beautiful and practical booklets.
DIY Saddle Stitch Binding
DIY Saddle Stitch Binding lets you make professional-looking booklets at home. You’ll need the right supplies and some time. Create beautiful books for note taking, scrap booking, or journaling. Follow the step-by-step guide below.
Step-by-Step Instructions
- Have these tools ready: paper, thread, needle, awl, ruler, and scissors.
- Fold the pages to make them into booklets. Make sure they’re neat and aligned.
- Use a ruler and mark spots for holes with a pencil. Holes should be 0.5 to 1 inch apart. You often use five holes.
- With the awl, poke holes where you marked. The hole should fit the needle and go through all pages together.
- Thread the needle with a length twice the book’s height. Start in the middle hole, with a bit of thread left outside.
- Weave the needle up and down through the holes. Keep the thread tight as you go.
- When you get to the last hole, make sure the thread is tight. Then, tie a strong knot. For safety, do a double knot if your thread is thin.
- Cut any extra thread near the knot without untying it. You can also make a bow with the extra thread.
- Lastly, fold the cover over the booklet. Make sure everything looks neat. Your DIY booklet is done!
Required Tools and Materials
| Tools | Materials |
|---|---|
| Awl | Quality paper |
| Needle | Durable thread or wire staples |
| Ruler | Self cover |
| Scissors | Pencil for marking |
This guide and the needed supplies make starting a DIY Saddle Stitch Binding project easy and fun. You can finish your booklet in less than 30 minutes. It’s great for different uses. Dive in and create your own booklet. Enjoy the process!
Common Applications of Saddle Stitch Binding
Saddle stitch binding is loved for its simple, yet versatile, nature. It’s perfect for creating neat, professional documents. Many types of publications use this method to achieve a sleek look.
Magazines and Catalogs
Magazines and catalogues use saddle stitch binding a lot. It’s cost-effective and fast. Saddle stitch allows these books to lay flat, which is great for reading. Also, it works well for catalogues by enhancing their visual appeal.
Brochures and Flyers
Brochures and flyers commonly feature saddle stitch binding. This method is slim, making it easy to distribute. It’s a smart choice for marketing materials on a tight budget. Its low cost doesn’t sacrifice a professional look.
Instruction Manuals
When it comes to instruction manuals, durability and user-friendliness are key. Saddle stitch binding is great for thinner manuals. It provides a smooth spine and is eco-friendly. You can also make manuals in various sizes and formats.
In summary, saddle stitch binding is perfect for many document types. It’s affordable, works well, and looks professional. This is why it’s a favourite for works with fewer pages.
Customisation Options for Saddle Stitch Binding
Choosing the right customisations makes your saddle stitched booklets better. You can pick from many options. These can include rich finishes or bright staple colours.
Cover Materials
Saddle stitched books have soft covers that come in 10-point and 12-point thickness. You can add special finishes like glossy, matte, or textured. For example, a glossy cover looks sleek, while a matte cover feels elegant. The cover’s look and feel is crucial. It makes your booklet durable and easy to use.
Staple Colours
Picking the right staple colours can improve your booklet’s design. You can choose from standard metallic to vibrant colours. This makes your booklet’s look cohesive. It stands out while looking professional.
The choices in customisation for saddle stitch binding are vast. You can change materials and colours to fit your goal. Whether you want a fancy or bold design, these options help. They make your booklet unique and functional.
Common Issues and Solutions in Saddle Stitch Binding
Saddle stitch binding is excellent, but it can face some problems. These can be fixed by focusing on certain steps during production. This way, the final product will be of high-quality.
Page Misalignment
Page misalignment often happens in saddle stitch bound books. It makes pages look uneven. Making sure all pages are lined up correctly before binding is key. For thicker books, remember to include creep allowance. This accounts for pages sticking out after folding.
Keeping the printer calibrated well helps keep all pages in line.
Staple Placement
Staples need to be in right on the fold for booklets to work and look good. They should be placed to hold all sheets without tearing the paper.
Choosing the right staple’s size and type is critical. Most books need two staples. For bigger books, you might need more just to make them last longer.
Let’s sum up the issues and their fixes:
| Issue | Solution |
|---|---|
| Page Misalignment | Make sure to align pages well before binding. Use creep allowance and keep the printer calibrated. |
| Improper Staple Placement | Staples must be placed precisely. Pick the right size and consider more staples for thick booklets. |
| Cover Wear and Tear | Choose stronger cover materials and add protective finishes to make the cover last longer. |
Tackling these issues in saddle stitch binding ensures better booklets. Whether it’s a shiny magazine or an educational brochure, these steps lead to professional results.
Cost Factors Involved in Saddle Stitch Binding
Learning about the cost factors in saddle stitch binding is key. It helps us stick to budgets without sacrificing quality. Several factors can change the total cost, so knowing the main ones is important.
Material Costs
Material costs are mainly about picking the right paper and ink. Using high-end materials such as premium paper and quality inks can boost your project’s look. Also, think about special finishes like gloss or matte and how many pages you need. Remember, with saddle stitch binding, the page total must be in fours.
Print Run Volume
The number of copies you need affects the cost too. More copies can lower the cost for each one. This is because the more you print, the cheaper it can be per unit. So, printing in larger amounts is often the smarter choice budget-wise.
A quick look at potential cost elements versus the amount of copies needed is below:
| Cost Factor | Low Volume | High Volume |
|---|---|---|
| Material Costs (per booklet) | High | Low |
| Saddle Stapler & Equipment | Moderate | Moderate |
| Labour Costs | High | Lower per piece |
| Shipping Costs | Varies | Bulk Shipping Reduces Costs |
Upgrading the tools in your print shop can improve your work and cut costs. Better equipment means more precise and consistent results. So, it’s important to consider materials, the number of copies, and your equipment for better budget management in your print projects.
Saddle Stitch Binding with MVP Print
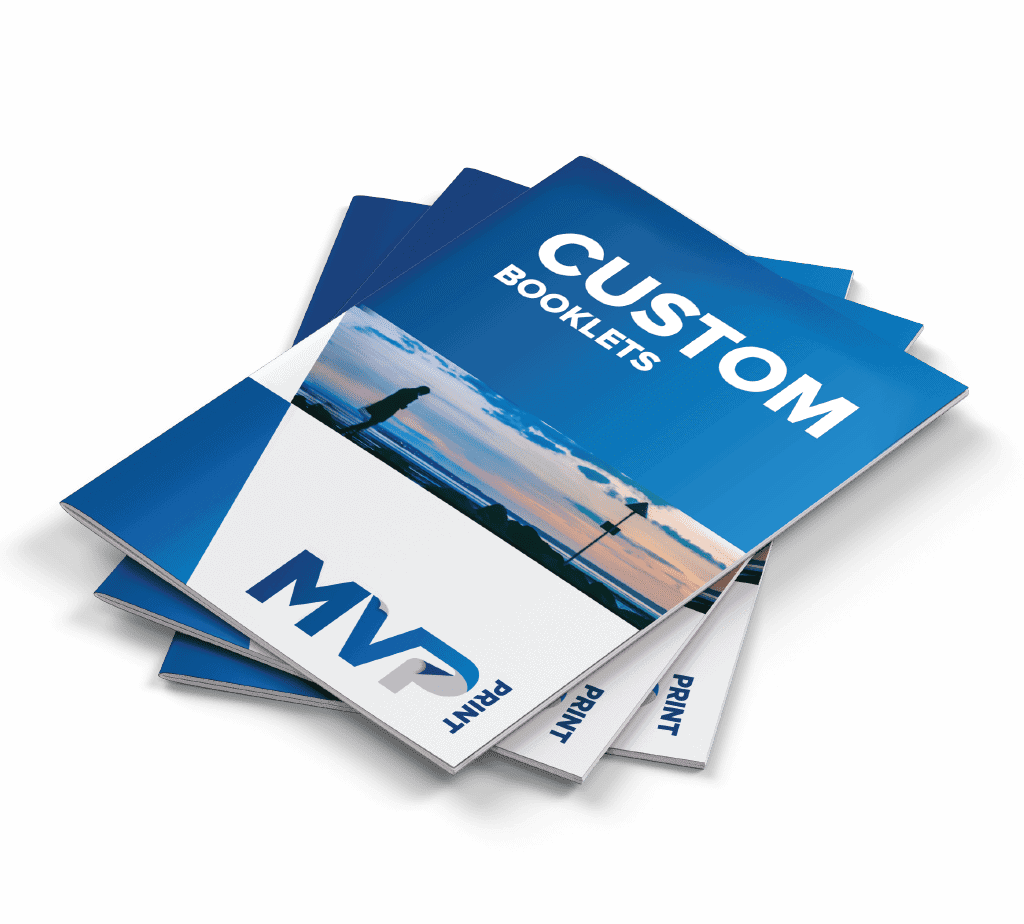
MVP Print is a top choice for excellent saddle stitch binding. They make sure your printed stuff looks great and lasts long. With a focus on saddle-stitched booklets, they meet various print needs. They offer solutions that fit perfectly with what you want.
Known for fast service, MVP Print gets your books ready quickly. They also deliver across Australia in 3 to 5 days. This quick service means your books arrive when you need them.
Saddle stitch binding is perfect for smaller prints like booklets and mags. It’s both budget-friendly and dependable. MVP Print works closely with you to ensure your project is exactly as you imagined. They mix looks with practicality the way you want.
When you order from MVP Print, things move smoothly. You’ll get an email with your PDF proof to check within 24 hours. This step makes sure your prints look just right before they go to print.
| Binding Method | Ideal For | Flexibility | Turnaround Time | Delivery Time |
|---|---|---|---|---|
| Saddle Stitch Binding | Booklets, Magazines, Smaller Publications | Cost-effective, Lays Flat | Fast | 3 to 5 Business Days |
| PUR Perfect Binding | Softcover Books, Novels, Catalogs | Sleek and Professional | Fast | 3 to 5 Business Days |
| Wiro Binding | Notebooks, Manuals, Presentations | Lays Flat, Versatile | Fast | 3 to 5 Business Days |
| Coil Binding | Cookbooks, Reference Materials, Training Manuals | Flexible, Opens Flat or Folds Back | Fast | 3 to 5 Business Days |
Choose MVP Print for high-grade saddle-stitch prints. They handle all your print needs with care and speed. Their commitment to top quality and quick service makes them a standout in the print biz. For saddle stitch binding, they are your best choice.
Conclusion
Saddle stitch binding offers a budget-friendly, sleek, and versatile solution for many printing needs. It’s perfect for small publications like brochures or magazines up to 64 pages. This method keeps costs down and gets your print materials out quicker than other methods.
Perfect binding is best for thick books or manuals. However, saddle stitch binding shines when you’re working on a tight budget or deadline. It lets you produce materials that look good and work well. You can also get creative with the look, from the cover to the staple colours.
To avoid problems like page creep and messy staples, good planning is key. MVP Print’s expert service ensures a top-quality finish with saddle stitch binding. It’s great for projects from promotional booklets to annual reports, offering a stylish and practical option.
FAQ
What is saddle stitch binding?
In saddle stitch binding, folded sheets are gathered and stapled down the fold. This method is simple and effective for booklets and magazines.
How does saddle stitch binding compare to other binding methods?
Saddle stitch binding is cheaper than perfect or spiral binding. It makes booklets easy to read because they can open flat.
What are the advantages of saddle stitch binding?
This binding method is cost-effective and looks professional. It keeps the pages neat and lays flat. Plus, it works with many paper types and sizes.
What types of paper can be used in saddle stitch binding?
You can use many paper types, from lightweight to premium. The paper choice depends on the project’s needs.
What tools and materials are needed for saddle stitch binding?
For saddle stitch binding, you’ll need paper, staples, and tools like an awl. Machines can speed up the process.
Can you explain the saddle stitch binding process?
To bind, pages fold together with staples in the middle. This stitching makes the book sturdy and professional looking.
What should be considered in saddle stitch booklet design?
Remember, the page count needs to be a multiple of four. Creep adjustment is important for thick booklets. Making sure the design, margins, and colours match is key.
How can I perform saddle stitch binding at home?
Start by folding and aligning your pages. Then use an awl to make holes for stitching. Finally, cut off any extra paper for a smooth finish.
What are common applications of saddle stitch binding?
This method is great for magazines, programs, and brochures. It’s popular in marketing for its low cost and easy sharing.
What customisation options are available for saddle stitch binding?
You can pick from different covers and staple colours to match your style. This lets you create a unique look that fits your brand or theme.
What are common issues in saddle stitch binding, and how can they be resolved?
Issues like page alignment are solved with careful setup and calibration. Using the right materials and staples helps prevent wear.
What cost factors are involved in saddle stitch binding?
The cost depends on the paper, size, and quantity. More prints can reduce the cost per unit. Additional features also impact the price.
Why choose MVP Print for saddle stitch binding?
MVP Print offers top-quality saddle-stitched booklets that meet your needs. They work closely with you for a solution that represents your project well.