

Welcome to our comprehensive guide on saddle stitching book production! Whether you’re a beginner or looking to enhance your skills, this guide will take you through the process of creating professional saddle stitched booklets. Saddle stitching is a popular bookbinding method that involves binding pages together using staples or thread. With the techniques and knowledge gained from this guide, you’ll be able to produce high-quality saddle stitched books with ease.
In this guide, we will cover everything you need to know about saddle stitching, from understanding the basics to designing and assembling your booklets. We’ll also explore important aspects such as choosing the right paper stock, setting up margins and bleed, folding techniques, staple binding, trimming and cutting, and quality control. Additionally, we’ll discuss alternative binding methods for when saddle stitching isn’t the best option.
So, let’s dive in and discover the art of saddle stitching book production!
Key Takeaways:
- Saddle stitched booklet binding is a popular method that involves binding pages that are folded using staples or thread.
- This guide is designed for beginners who want to learn the basics of saddle stitching book production.
- You’ll learn about choosing the right paper stock, setting up margins and bleed, folding techniques, staple binding, trimming and cutting, and quality control.
- Alternative binding methods, such as perfect binding, will also be discussed.
- By the end of this guide, you’ll have the knowledge and skills to create professional saddle stitched booklets with confidence.
Understanding the Basics of Saddle Stitching
In this section, we will explore the fundamentals of saddle stitching. Saddle stitching is a bookbinding technique where folded pages are fastened together along the fold line using staples or thread. This method is commonly used for creating booklets, brochures, magazines, and other small publications.
We will discuss the advantages and limitations of saddle stitching, as well as the tools and materials required for the process. By understanding the basics of saddle stitching, you’ll gain a solid foundation for producing your own saddle stitched books.
Choosing the Right Paper Stock for Your Project
The paper stock you choose plays a significant role in the overall quality and durability of your saddle stitch booklets. It is essential to select the right paper for your project to ensure a professional and long-lasting finish. In this section, we will discuss the importance of paper thickness and quality, as well as the various options available for self cover and cover printed projects. Most print service providers have an extensive range of stocks to cater for your every need.
Importance of Paper Thickness and Quality

When it comes to saddle stitching, paper thickness and quality are crucial factors to consider. The thickness of the paper affects the overall look and feel of your book, as well as its durability. Thicker paper stock generally provides a more substantial and high-end appearance. In contrast, thinner paper stock can give your book a sleek and lightweight feel.
Additionally, the quality of the paper directly impacts how well it withstands wear and tear. Choosing a paper stock with good quality fibers and a smooth finish will ensure that your book remains intact and looks professional, even after frequent use.
When selecting the paper thickness and quality, it’s essential to consider the purpose of your saddle stitched book and the impression you want to create with your audience. Whether you’re creating a marketing brochure or a storytelling booklet, the right paper choice will enhance the overall reading experience and reflect the value of your content.
Options for Self Cover and Cover Printed Projects
When it comes to saddle stitched books, you have two main options for the cover: self cover or cover printed.
A self cover refers to using the same paper stock for both the cover and the inner pages of the book. This option provides a cohesive and unified look, where the cover seamlessly blends with the rest of the content. It is an excellent choice for projects that require a clean and minimalist design.
On the other hand, cover printed projects involve using a different paper stock for the cover, giving it a distinct and eye-catching appearance. This option allows for more creative freedom, as you can choose a paper stock that complements or contrasts with the inner pages. Cover printed projects are ideal for adding visual impact and creating a memorable first impression.
Consider the design aesthetic and purpose of your saddle stitched book when deciding between self cover and cover printed options. Both choices offer unique advantages, and selecting the right option will further enhance the visual appeal and overall quality of your finished book.
| Paper Type | Thickness (GSM) | Suitability |
|---|---|---|
| Lightweight paper | 70-100 | Ideal for brochures and informational booklets |
| Standard paper | 100-120 | Great for a wide range of saddle stitched books |
| Heavyweight paper | 120-200 | Provides a premium feel and durability |
| Cover stock | 200+ | Perfect for cover printed projects |
Designing Your Saddle Stitched Booklet
Designing your saddle stitched booklet is a crucial step in creating a visually appealing and engaging final product. In this section, we will explore the key elements of effective design that will make your booklet stand out.
1. Page Layout: Consider the overall arrangement of content on each page, ensuring a logical flow and easy readability. Use columns, grids, or templates to maintain consistency throughout the booklet.
2. Typography: Choose fonts that match the tone and purpose of your booklet. Use a combination of fonts for headings, subheadings, and body text to create visual hierarchy and enhance readability.
3. Images: Include high-quality and relevant images that support the content and enhance the overall visual appeal. Ensure images are properly sized and optimized for web or print depending on your intended distribution method.
4. Colors: Select a color palette that complements the topic and creates a cohesive look throughout the booklet. Consider the emotions and associations different colors evoke to create the desired impact.
5. Design Considerations for Saddle Stitched Booklets:
– Page count: Determine the number of pages in your booklet and plan your design accordingly. Consider using a multiple of four for easier folding and binding.
– Bleed areas: Allow for a bleed area around each page to ensure that there are no white borders or unwanted margins after trimming.
– Imposition: Arrange pages in the correct order for printing and binding, considering the folding and stitching process.
By carefully considering these design aspects, you can create a professional and engaging saddle stitched booklet that effectively communicates your message to your audience.
Preparing Your Document for Saddle Stitching

Setting Up Margins and Bleed
Properly setting up margins and bleed is an essential step in preparing your document for saddle stitching. Margins ensure that the content is correctly positioned on each page, while bleed allows for any images or background colors to extend beyond the page edge, ensuring a clean and professional appearance.
To set up margins, you’ll need to adjust the document settings in your preferred design software. Typically, you’ll want to leave a sufficient space between the content and the edge of the page to prevent any text or images from being trimmed during the trimming and cutting process. This space is known as the margin.
When it comes to bleed, it’s important to extend any elements that you want to have bleed off the page by an additional few millimeters. This ensures that there are no white borders around the edges of your saddle stitched book once it’s trimmed.
Here’s a step-by-step guide to setting up margins and bleed:
- Open your document in your design software.
- Access the document settings or page setup options.
- Adjust the margin settings according to your preference and the requirements of your printing service provider.
- Enable bleed and set the bleed size to a few millimeters to ensure sufficient coverage.
Add Blank Pages Where Necessary
Adding blank pages to your document is an important step in maintaining the correct page order and ensuring proper folding during the saddle stitching process.
Blank pages are typically inserted in saddle stitched books to create a consistent layout and prevent sections from being misaligned. They are especially useful when you have an odd number of pages or when you want to maintain a specific arrangement of content.
To add blank pages, follow these steps:
- Identify the sections or points in your document where blank pages need to be inserted.
- Determine the number of blank pages needed.
- Insert the blank pages at the appropriate locations in your document.
By taking the time to set up margins and bleed correctly and adding blank pages where necessary, you’ll ensure that your document is ready for the saddle stitching process and can move forward with confidence to the next stage of production.
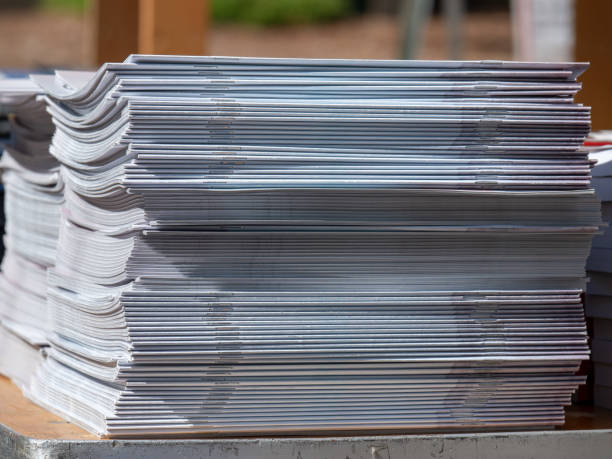
Assembling Printed Pages for Binding
Once you have your printed pages ready, the next step is to assemble them for binding. Assembling the pages correctly ensures that your saddle stitched book will have a seamless and professional appearance. To guide you through this process, we have outlined the necessary steps below:
- Start by arranging your pages in the correct order. Double-check that every page is included and in the right sequence, as any missing or misplaced pages can affect the overall coherence of your book.
- Handle the pages with care to avoid creasing or tearing them. Place the pages on a clean, flat surface, making sure they are aligned neatly.
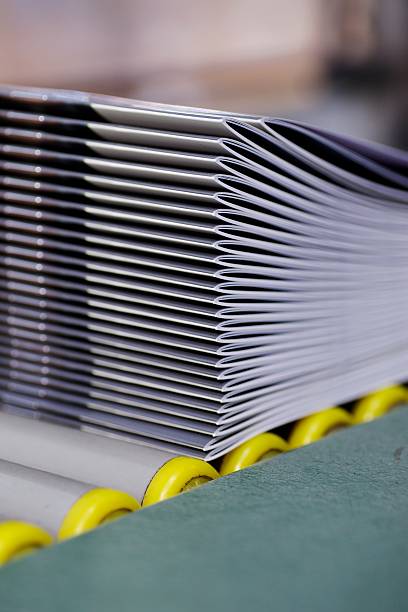
- If your book contains multiple signatures (folded groups of pages), arrange them in the correct order as well. Make sure the fold lines are aligned and that the pages are evenly stacked.
- When all the pages are lined up, gently tap the stack on a flat surface to ensure they are properly aligned and settled.
By following these steps, you will be one step closer to completing your saddle stitched book. The careful assembly of printed pages is a crucial part of the binding process, ensuring that your book looks polished and professional. Take your time to make sure every page is in the right place, and pay attention to detail to achieve a high-quality finished product.
It’s important to note that if you are working with a large number of pages, it may be helpful to divide them into smaller sections for easier handling and alignment. This approach can prevent the pages from becoming disorganized or misplaced during the assembly process.
Remember, precision and attention to detail are key during the assembly stage. Take your time, handle the pages with care, and ensure that everything is in the correct order. With proper assembly, your saddle stitched book will come together beautifully, ready to be bound and enjoyed by readers.
Folding Techniques for a Crisp Finish
Folding plays a crucial role in the saddle stitching process as it determines the final appearance and functionality of your book. To achieve a crisp and professional finish, it is important to master different folding techniques. Accurate folding ensures even edges, giving your book a polished look. To assist with folding and creasing, there are various tools available that can make the process easier and more precise.
Ensuring Accurate Folding for Even Edges
When folding your pages, it is essential to maintain accuracy to achieve even edges. This ensures a clean and professional appearance for your saddle stitched book. To ensure accurate folding, follow these tips:
- Use a straight edge or folding bone to create a precise fold.
- Align the edges of the paper before making the fold.
- Apply even pressure along the fold line to create a sharp crease.
- Check the edges after folding to ensure they are aligned and even.
Tools to Assist with Folding and Creasing
To make the folding process easier and more precise, consider using the following tools:
- Folding bone or bone folder: A versatile tool that helps create sharp folds and creases.
- Scoring board: A tool that allows you to score and fold paper accurately.
- Folded paper machine: Ideal for high-volume folding, ensuring consistent and precise folds.
- Cutting mat with a scoring grid: Provides a surface for folding and creasing while allowing for precise measurements.
By incorporating these folding techniques and using the right tools, you can achieve a crisp finish with even edges for your saddle stitched book. These techniques and tools contribute to the overall quality and professional appearance of your final product.
| Tool | Description |
|---|---|
| Folding bone or bone folder | A versatile tool that helps create sharp folds and creases. It is made of bone, plastic, or Teflon, and its smooth, flat surface allows for precise folding. |
| Scoring board | A tool that provides a measuring guide and an indented groove to score paper accurately for folding. It ensures consistent folds and is suitable for both light and heavy-weight paper. |
| Folding machine | An automated tool that makes the folding process fast and efficient. It is ideal for large volume production and ensures consistent and precise folds. |
| Cutting mat with a scoring grid | A mat with a built-in scoring grid that allows for precise measurements and accurate folding. It provides a smooth surface for folding and creasing, making it easier to achieve even edges. |
Staple Binding: The Heart of Saddle Stitching
In the world of saddle stitching, staple binding plays a central role in creating secure and durable books. The choice of wire staples is essential for achieving a strong bind that withstands the test of time.
Using Wire Staples for a Secure Bind
Wire staples are the preferred choice for saddle stitching due to their strength and reliability. These staples provide a secure bind that holds the pages together firmly, preventing them from loosening or falling apart.
Wire staples are designed to penetrate through the folded pages and hold them in place along the center fold line. This binding method ensures that the pages remain intact and aligned, even with frequent use or handling.
Whether you’re creating booklets, brochures, annual reports or a magazine, using wire staples ensures that your saddle stitched books maintain their structural integrity, providing a professional and polished appearance.
Managing Setup Costs for Thicker Booklets
When working with thicker booklets, additional considerations and challenges arise. Thicker booklets require more staples and may require adjustments to the stapler settings to accommodate the increased thickness.
One factor to consider when dealing with thicker booklets is managing the setup costs. As the thickness of the booklet increases, the cost of production may also increase due to the additional materials and time involved.
However, by implementing efficient production methods and optimizing the stapling process, it is possible to manage setup costs while maintaining the quality and durability of thicker saddle stitched booklets.
Working closely with your printing and binding partner can help you explore cost-saving options and find the most cost-effective solution for your specific project. By carefully considering the setup costs, you can ensure that your thicker saddle stitched booklets meet both your budget and quality requirements.
In conclusion, staple binding is the heart of saddle stitching, providing a secure and durable bind for your books. By using wire staples, you can achieve a strong and reliable bind that holds the pages together firmly. When working with thicker booklets, managing setup costs becomes crucial to balance quality and affordability. By understanding the essentials of staple binding and considering the challenges of thicker booklets, you can create saddle stitched books that are not only visually appealing but also long-lasting and cost-effective.
Finishing Touches: Trimming and Cutting
Trimming and cutting are the final steps in the saddle stitching process that give your book a polished and professional look. Achieving clean edges and uniform dimensions is crucial to create a visually appealing finished product. Let’s explore the importance of trimming and cutting in more detail.
Trimming is the process of cutting off any excess paper from the edges of your saddle stitched book. This step ensures that all the pages have consistent dimensions and align perfectly. By trimming the book, you eliminate any rough or uneven edges, resulting in a clean and professional appearance.
When trimming your book, it’s important to use precise cutting tools to achieve accurate cuts. A guillotine paper cutter is a popular choice for this task, as it allows you to trim multiple pages at once with precision. Take your time and make sure to align the pages properly before cutting to ensure a straight and even trim.
Cutting, on the other hand, refers to the process of dividing your saddle stitched book into individual booklets. If you have multiple booklets in a larger publication, you’ll need to cut them apart to separate them. Again, a guillotine paper cutter or a rotary trimmer can be used for this purpose, depending on the thickness of your book and the precision you require.
When cutting your booklets, it’s essential to follow the trim marks or guidelines provided in your design. This will help you maintain consistency in the size and shape of each booklet. Carefully align the pages, ensuring they are level and evenly trimmed, before making the final cut.
By paying attention to the finishing touches of trimming and cutting, you can ensure that your saddle stitched book looks professional and ready for use or distribution. Mastering these steps will give your book a flawless and refined appearance, leaving a lasting impression on your readers or clients.
Saddle Stitching Book: From Setup to Completion
In order to successfully produce a saddle stitched book, it is essential to follow a step-by-step process from setup to completion. By understanding the chronological steps involved and considering the option of integrating hard cover options, you can ensure a professional and durable finished product. Let’s explore the journey of saddle stitching a book.
Chronological Steps for a Saddle Stitched Book
- 1. Designing: Begin by creating a visually appealing layout for your book, incorporating key design elements such as page layout, typography, images, and colors. Pay attention to factors specific to saddle stitched booklets, such as page count and bleed areas.
- 2. Preparing the Document: Set up margins and bleed to ensure a clean and professional appearance. Include blank pages where necessary to maintain the correct page order and facilitate proper folding.
- 3. Printing and Assembling: Print your pages and assemble them in the correct order, aligning them for binding.
- 4. Folding: Utilize folding techniques to achieve a crisp finish and ensure even edges. Take advantage of folding tools to assist with accurate creasing.
- 5. Staple Binding: Use wire staples for a secure bind, taking into account the setup costs for thicker booklets.
- 6. Trimming and Cutting: Give your book a polished and professional look by trimming for clean edges and uniform dimensions. Make sure to cut accurately and safely.
Integrating Hard Cover Options
In addition to the standard saddle stitching method, you can consider integrating hard cover options for enhanced durability and presentation. Hard covers can provide extra protection to your book, making it more suitable for long-term use or as a premium product. Explore the different hard cover options available, including materials, finishes, and customization possibilities. By incorporating hard covers into your saddle stitched book, you can elevate its overall quality and appeal.
Quality Control and Review
Quality control is a critical aspect of the saddle stitch binding process, ensuring that your books meet the highest standards of consistency and precision. By thoroughly inspecting your books, you can identify any flaws or errors that may have occurred during production, allowing you to make necessary corrections and deliver flawless and high-quality books consistently.
Inspecting for Consistency and Precision
When conducting a quality control review, it is essential to pay attention to the consistency and precision of various elements in your saddle stitched books. This includes checking for uniform page sizes, proper alignment of text and images, accurate folding and trimming, and consistent placement of staples or threads. By inspecting these details, you can ensure that every book you produce maintains a professional and polished appearance.
Mitigating Common Issues in Saddle Stitch Binding
While saddle stitching is a reliable binding method, there are common issues that can arise during the production process. To maintain the highest quality standards, it is important to be aware of these issues and take proactive measures to mitigate them. Common issues include pages not aligning correctly, staples or threads not securing the pages tightly, uneven trimming, and printing errors. By implementing thorough quality control measures and addressing these issues promptly, you can overcome potential challenges and consistently deliver outstanding saddle stitched books.
| Common Issues | Mitigation Strategies |
|---|---|
| Pages not aligning correctly | Double-check page numbering and folding alignment, ensuring proper imposition and folding techniques. |
| Staples or threads not securing pages tightly | Adjust staple or thread placement and ensure proper tension for a secure bind. |
| Uneven trimming | Use precise cutting tools and techniques, ensuring uniform trimming across all pages. |
| Printing errors | Carefully proofread and review each page before production, ensuring accurate printing and consistent color reproduction. |
Alternative Binding Methods: When Saddle Stitching Isn’t Right
While saddle stitching is a versatile and cost-effective binding method, there may be situations where alternative methods are more suitable. In this section, we will explore alternative binding methods that you can consider when saddle stitching isn’t the right choice for your project.
Perfect Binding for Larger Page Counts

Perfect binding is a popular alternative binding method, especially for books with larger page counts. Unlike saddle stitching, perfect binding uses glue to securely bind the pages together along the spine. This method offers several advantages, including a flat spine that allows for easy readability and a professional appearance. Perfect binding is commonly used for paperback books, catalogs, and thicker magazines.
If you’re working on a project with a significant number of pages or a book that needs to lay flat when opened, perfect binding is an excellent option to consider. It provides durability and a clean, polished finish, making it suitable for a variety of publications.
Using Excess Thread for a Different Aesthetic
If you’re looking to add a unique touch to your bookbinding project, consider using excess thread as a decorative element. This technique can create an eye-catching aesthetic that sets your book apart.
By intentionally leaving excess thread on the spine of the book, you can achieve a more rustic or handcrafted look. This method works especially well for art books, journals, and special edition publications. It adds a tactile element and visual interest, making your book visually appealing and memorable.
Before attempting this technique, it’s important to note that it may not be suitable for all types of projects, such as books with a high page count or books with a need for a completely flat opening. However, if you’re looking to experiment and add a unique touch to your bookbinding, using excess thread can offer a captivating and different aesthetic.
In conclusion, when saddle stitching isn’t the best choice for your project, alternative binding methods like perfect binding and using excess thread can provide excellent alternatives. Consider the specific requirements of your project and the desired aesthetic to determine which alternative method will best suit your needs.
Conclusion
As we come to the end of this comprehensive guide to saddle stitching book production, it’s clear that mastering this technique is essential for creating professional-quality books. We have covered the fundamentals of saddle stitching, from understanding its advantages and limitations to the tools and materials required. We have also explored the importance of choosing the right paper stock, designing your booklets, preparing your document, assembling the printed pages, applying folding techniques, staple binding, trimming and cutting, and conducting quality control.
Whether you’re a beginner or looking to enhance your existing skills, saddle stitching is a valuable technique to learn. By applying the knowledge and techniques gained from this guide, you’ll have the confidence to produce beautifully bound saddle stitched books. Remember to pay attention to details such as paper stock selection, margin and bleed setup, accurate folding, secure binding, and precise trimming. These elements contribute to the overall quality and durability of your books.
With your newfound expertise in saddle stitching, you can create booklets, brochures, magazines, and other small publications that stand out in terms of both aesthetics and functionality. Whether you’re producing materials for personal use, self-publishing, or creating promotional items for your business, saddle stitching offers a cost-effective and efficient option for professional book production. So, put your knowledge to use and start creating high-quality saddle stitched books today!
FAQ
What is saddle stitching?
Saddle stitching is a bookbinding technique where folded pages are fastened together along the fold line using staples or thread. It is commonly used for creating booklets, brochures, magazines, and other small publications.
What are the advantages of saddle stitching?
Saddle stitching is a cost-effective binding method and allows for easy flipping and reading of pages. It is also suitable for smaller page counts and offers a lay-flat reading experience.
What tools and materials do I need for saddle stitching?
The basic tools and materials for saddle stitching include staples or thread, a stapler or saddle stitcher, a bone folder for creasing, and a cutting tool for trimming. You may also need folding tools, rulers, and a paper cutter for larger projects.
What types of paper stock should I choose for saddle stitching?
The paper stock you choose should have the appropriate thickness and quality for your project. For covers, self cover options use the same paper as the inner pages, while cover printed projects have a separate cover stock. It’s important to consider the weight and finish of the paper to achieve the desired look and durability.
How should I design my saddle stitched booklet?
When designing your saddle stitched booklet, consider factors such as page layout, typography, images, and colors. Pay attention to the page count and placement of elements to ensure a visually appealing and cohesive design.
How do I set up margins and bleed for saddle stitching?
Setting up margins and bleed ensures that your content is correctly positioned and allows for trimming. Leave sufficient space in the margins and extend images or background colors beyond the trim edge to accommodate trimming variations. Consult your printing provider for specific measurements.
Why should I add blank pages to my document?
Adding blank pages is important to maintain the correct page order when saddle stitching. It ensures that each printed page is paired correctly and allows for proper folding without disrupting the content flow.
How do I assemble the printed pages for binding?
To assemble the printed pages for saddle stitching, arrange them in the correct order and align them along the fold line. Take care to handle the pages gently to avoid damage and ensure accurate positioning.
What folding techniques should I use for saddle stitching?
There are various folding techniques you can use to achieve a crisp and professional finish, such as the single fold, accordian fold, or gate fold. Consulting folding tools and creasing equipment can help ensure accurate folding for even edges.
What type of staples should I use for saddle stitching?
Wire staples are commonly used for saddle stitching due to their strength and durability. They provide a secure bind for booklets of varying thickness. Consider the thickness of your booklet and consult your printing supplier for appropriate staple sizes.
How do I trim and cut my saddle stitched book?
Trimming and cutting are the final steps in the saddle stitching process. Use a paper cutter or a cutting tool with a straight edge to achieve clean and uniform edges. Take care to follow the proper measurements to ensure consistent dimensions.
Can I integrate hardcover options for my saddle stitched book?
Yes, integrating hardcover options can add durability and a premium look to your saddle stitched book. Consult with your printing provider for hardcover binding options and the specific requirements for incorporating a hard cover.
What should I check during quality control for saddle stitched books?
During quality control, inspect your saddle stitched books for consistent page alignment, proper staple placement, and overall precision. Look out for any flaws, such as loose pages or uneven trimming. Make sure that the final product meets your desired quality standards.
What alternative binding methods can I consider?
If saddle stitching is not suitable for your project, you can explore alternative binding methods such as perfect binding for books with larger page counts. Additionally, you can experiment with using excess thread for a unique aesthetic in bookbinding.