In today’s digital era, the printed word continues to hold a special place in our hearts. Whether you’re creating a brochure, an event program, a small magazine or a marketing booklet , a saddle stitched booklet offers a timeless, cost-effective way to convey your message. In this guide, we will take you through the process of crafting your saddle-stitched booklet.
If you’re searching for a printing partner to bring your project to life look no further than us here at MVP Print. With our commitment to quality and precision, MVP Print can transform your design into a saddle-stitched booklet that is bound to leave an impression on your target audience.
Understanding Saddle Stitching
Before delving into the details of designing and creating a saddle stitch booklet, it is crucial to grasp what saddle stitching entails. Why it remains a great choice for most book-bound print projects.
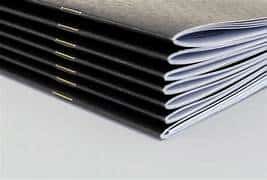
Saddle stitching is a binding method commonly employed for booklets, brochures, pamphlets and magazines. It entails folding paper sheets in half and securing them together by stapling along the folded edge.
This results in a fold commonly known as a spine that holds the pages together.
Advantages of producing a Saddle Stitched Booklet

Saddle stitching offers lots of benefits making it a popular choice as the preferred binding method for book and booklet printing...
1. Cost Effective
Saddle stitching is a cost-effective binding method. It requires less materials and less labour compared to binding techniques like perfect binding or wire binding.
2. Easy to Read Design
Saddle-stitched booklets open flat allowing readers to view the content without the pages constantly closing on their own.
3. Professional Appearance
Saddle-stitched booklets have a professional look ideal for marketing materials and promotional brochures.
4. Quick Turnaround
Due to its process saddle stitched booklets can be produced quickly making them an excellent option for last-minute printing requirements.
How to Create a Saddle Stitched Booklet from Scratch

Planning Your Saddle Stitched Booklet
Before you embark on designing your saddle stitched booklet it’s essential to plan and gather all the information. Consider factors such as the purpose of your booklet, target audience, content and design elements. Hard Cover or Self Cover ? Full Colour throughout or Black-White Inners. Determine this at the planning stage.
Define Your Goals
Begin by outlining your objectives for the booklet. Are you creating a brochure, for marketing purposes an event program or a product catalog? Understanding your aims will help guide your design decisions.
Identify Your Target Audience
Consider the individuals who will be reading your booklet. Having a grasp of your target audience will assist you in tailoring the content and design to their preferences and needs.
Layout of your Saddle Stitched Booklet
Decide on the information that will be included in your booklet. Organize this content into sections and plan the layout accordingly. Remember to keep the content concise and engaging. Make sure the booklet size of your project is viable.. For example, A4 Landscape will cost more than A4 Portrait due to the flat size being much bigger and generally requires a bigger (more expensive) press.
Design Elements
Select a colour scheme, fonts and images that align with both your brand identity and message. Consistency in design elements will give your booklet a robust and aligned appearance.
The Graphics Design Phase of your Saddle Stitched Booklet

Layout and Pagination
Begin by setting up your document using your preferred design software such as Adobe InDesign or Illustrator. Other programs that can be used are Publisher or, in some cases, Canva, but you need to be very particular with them are they are predominately aimed at the online, not print market. Avoid Microsoft Word if you can – it is a text program and automatically downgrades images. Ensure that you set the page size to match the trimmed dimensions of your booklet.
Saddle Stitched Booklet Page Order
Arrange all of your content in its sequence, within the booklet.
The first page of a booklet is the Outside Front cover, followed by the Inside Front cover, the Inside Back cover and finally the Outside Back cover. If your book is self cover saddle stitch booklet, it can be provided in a single-scrolling PDF. If a hard cover or the cover is a different weight than the inner pages for your Saddle Stitch Booklet, provide one file for the Cover Artwork, and a second for the inner pages.
Very Important! Saddle Stitching must have a page count in multiples of 4. So the minimum is 8 pages, and depending on the paper type, the maximum of about 72. If it isn’t a multiple of 4 pages, it won’t work and you will need to add content, or even blank pages, to make it viable.
Bleed and Margins
Make sure your design extends to the bleed area to avoid having any edges when it’s trimmed. Leave space around content to keep it from getting too close, to the edges. 3mm Bleed on printed pages is preferable.
Image Resolution
To achieve high-quality printing results use images with a resolution (at 300 DPI) to avoid pixelation. If using Photoshop, up it to 600dpi as Photoshop will reduce the text on your design files automatically.
Colour Mode
Set your colour mode to CMYK for colour reproduction in print. CMYK is for print; RGB is for screen. if you design in RGB , when printing booklets you will notice a substantial colour shift as it will automatically convert to CMYK.
Fonts
Embed fonts. Convert text into outlines to ensure that the printed version maintains font appearance. This is the one most people forget, and can cause the most issues when we print booklets. Outlining the fonts ensures correct font reproduction.
Binding Margin
Allocate space on the margin where staples will be placed for binding. This ensures that no content gets lost during the binding process.
Proofreading your Saddle Stitched Booklet
Thoroughly review your content to eliminate any typos or errors before finalizing everything. Then proofread it again!
Time to Print Your Saddle Stitched Booklet !

Once your design is complete it’s time to move on to printing and preparing your saddle stitch booklet for production.
1. File Preparation
Ensure that your file is properly set up and meets all of the printer’s specifications.
2. Color Verification
Ask MVP Print for a colour proof to confirm that the colours match what you expect. This step is crucial in avoiding any unwanted surprises in the final product. Also known as a ‘Hard Copy Proof’ this is a digitally printed version of your Saddle Stitch Booklet, so you can see the final result prior to printing the main run. Make note that if your job is Offset printed, there will be a slight colour shift between Digital and Offset results.
3. Quantity Determination
Calculate the number of booklets you require. Communicate this information to the printer. Remember, if you need more later on there is another setup involved, so get slightly more than you need – just in case!
4.Prepress Stage
During prepress your pages will be organized in the order for saddle stitching. The printer will create a layout that takes into account the folding and binding process.
5. Printing Process of your Saddle Stitched Booklet
Once the layout is prepared the pages will be printed either collated or uncollated, pending the process (Digital or Offset). Test prints are done to ensure your Saddle Stitch book has the registration correct (front to back pages lining up), and then away we go!
6. Folding and Stitching Process
After printing the sheets will be folded in half creating a center crease for the booklet. The folded sheets will then be stapled along the spine using wire staples from a roll (production stitched) or staples (digitally or `hand’ stitched) This is the guts of what we are all about with this article.. there are many processes before and after this phase, but when we are talking about a `saddle stitch booklet’ – this is the defining part, where is it actually being `stitched
Trimming
After stapling the last step involves trimming the booklet to achieve its desired size.
Quality Assurance

Before shipping MVP Print conducts a quality check to ensure that each booklet meets your requirements. We carefully inspect for colour representation, page alignment and overall print quality.
Shipping
Once the quality check is done your saddle stitch booklets are all set to be shipped. MVP Print will make sure to package them safely and deliver them to your destination – anywhere in Australia!
All Done – and All Yours!
Crafting your saddle stitch booklets can be a fulfilling and cost-efficient method of sharing your message or promoting your business. By strategising your goals meticulously designing your booklet and partnering with a print service, like MVP Print, you can transform your vision into a professionally polished product. Saddle stitching provides a timeless and practical approach to presenting your content making it easily accessible, multiple times for the same cost, to an audience.
Start planning your saddle-stitched booklet project today and witness the transformation of your ideas into print. No matter if it is Research Material, Exhibition Catalogues, School Diaries, Event Booklets, Policy Documentation or a School Yearbook – if it’s doable, it’s stitchable !
